Considering Australians enjoy the largest homes in the world at a whopping 2032² feet / 188² m, it’s no surprise that when I moved to the US after living in tiny apartments in Japan and Britain, I bought my US home not just for size, but for it’s massive kitchen. As a couple who spend hours per day cooking from scratch, and as staunch utilitarians who research the hell out of every small purchase, our large kitchen renovation was always going to be epic. It’s almost a borderline industrial kitchen. Here’s my guide and advice from someone who did more kitchen renovation research than any other homeowner you’re likely to meet.
Table of Contents
Do You Need To Renovate?
Within a year of moving in, the original kitchen was falling apart. The appliances were a frustration to use, loud and ineffective. The loud but low airflow stove extractor fan, and dishwasher were the worst. The space was poorly designed, with woefully insufficient countertop and cabinet space, poor lighting, and loud as anything floorboards. We spend hours per day in the kitchen making everything from scratch. We even grow a lot of our own food (Instagram: SeattleFoodGardener).
Researching and planning our kitchen took 4 months starting in July, and while the actual work took 3 months starting in late November, this was an artificially long renovation due to COVID restrictions on indoor worker limits, stock availability, and yes, even a 2 week pause while the workers had COVID. (We tested negative, thank goodness.)
Altogether, the cost went from $90,000USD, up to about $120,000 for the kitchen, then eventually $150,000 once we decided to spread the renovation to other rooms. I’m glad we matched the wall paint, window shades, floors and ceiling lights in other rooms, but my god, my poor wallet.
 Renovation Relationship Survival Guide
I sometimes joke that I’ve been married for 5 years, happy for 4. The biggest stress our marriage experienced was when visiting dozens of homes when house-hunting, which taught us specific techniques for making such big decisions. Check out my totally separate article on how I saved my marriage undue renovation stress here. Tips include extremely useful physical tools worth buying and using, specific structures for communication, and the proper “-icide” term for killing your spouse. Read the article here.
The Best Free Floorplan Site or App
If you want to have a stab at communicating your vision to your designer or builder on paper, as well as verbally, in person, I can’t recommend floorplanner.com highly enough. Going into this, I was a complete amateur, and I tried a bunch of free software, and trials of paid software, including the free browser-based version of Google SketchUp for Web, but Floorplanner proved to be the simplest for an amateur to pick up and use, even beating the Ikea Planner. I have not tried any of those iPad based LiDAR room scanners, and would consider that if doing a whole house.
Making your own plans is not actually necessary, and probably rare. Designers and cabinetmakers have their own tools, like AutoCAD, Google SketchUp, and other in-house tools, so you’ll end up with pro drawings and 3D rendering before work starts anyway. Our designer even sent us her SketchUp rendering which we could open using the free desktop viewer, or view in the browser.
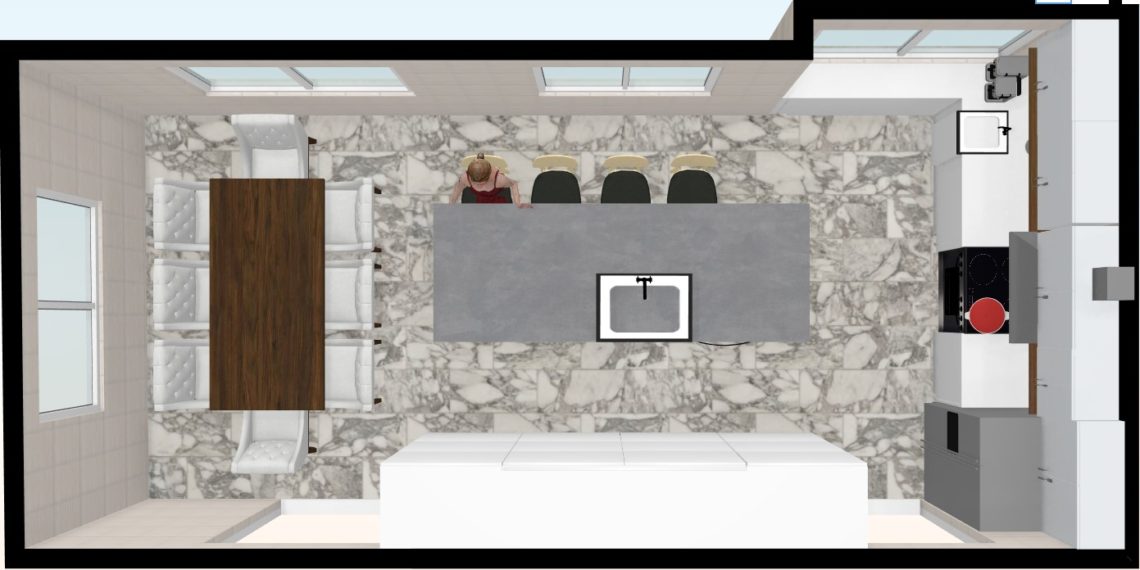
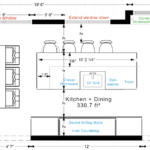
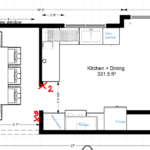
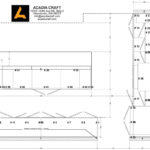
Below you’ll find my before floorplan, my after floorplan, and the cabinetmaker’s floorplan. More floorplans, renderings and photos coming soon.
Choosing a Designer
We interviewed 5 designers. While all were fine, we settled with Seattle-based Israeli-American Shoshi Cohen (Website, Houzz, Instagram), who was the only one who didn’t come over as a “yes man.” Time and time again she has demonstrated her knowledge, skills and worth, often through amazing communication and drawing skills to illustrate her points. As international people, we appreciated an international perspective, who can identify the optional things any Americans assume are universal. E.g. The need to spend cash on a fancy backsplash.
Another unique thing about Shoshi is she interviewed us about how we work in the kitchen. No one else did that. Our entire kitchen design is based around how I tend to hold court and entertain our guests in the kitchen at the same time as food prepping, while my spouse wants to be able to cook at the range, back to our guests, and focus. Hence the island is my kitchen area, and the wall with the range is his.
Finally, by hiring a designer, you’re not just hiring an expert – you’re getting connected to their network of retailers and wholesalers, who in turn are going to look after you far better than any walk-in off the street. You’re investing in priority attention, priority shipping, priority support, and priority should something go wrong. While you might not get discounts, you might get freebies. And finally, if anything truly does go wrong, you have a bulldog on your side, fighting for you.
Setting Up A Temporary Kitchen
If you have the space, avoid relying on unhealthy, expensive takeout, and set yourself up with a temporary kitchen.
Here’s what we had, in order of importance and frequency of use:
- A counter-height work surface.
- Height adjustable Ikea tables are a cheap way to achieve this, or put bricks under a table.
- Water in the room. We used a large jug until we acquired a used water cooler.
- A large tub for putting dishes into or doing dishes in.
- Large strainer/colander suspended above a large bowl for washing fruit and veg in. Asian supermarkets have these.
- Boxes and shelves for food, dishes, etc. Your old kitchen drawers are a sturdy alternative to cardboard boxes. Rescue them before the old kitchen demolition!
- Cooking appliances, as your oven will NOT be able to plug into normal 15 or 20 Amp power outlets.
- Countertop induction cooktop
- Get a higher end model with a dedicated “boil” button. It should come with the Amp draw for each power or temperature setting. Use this for calculating what is the maximum level you can put it on while also using other appliances at the same time, without tripping a fuse breaker.
- Microwave
- Toaster
- Sandwich press/electric griddle. (Can replace toaster if you’re short on space).
- Slow cooker / Crock Pot – these are cheap at charity second hand stores.
- Instant Pot – only buy when on special – Cyber Monday, Prime Day, etc.
- Mini oven.
- Air fryer. Best for baked goods, as it gets messy when roasting meat, and is hard to clean.
- Countertop induction cooktop
- Window-mounted exhaust fan.
- Remember to remove any smoke alarm in the new temporary kitchen space, as normal, non-smokey cooking will trip it! Modern homes have networked smoke alarms, and it may trigger them all!
Don’t forget to fill your freezer with your favorite home cooked food before the renovation too. A makeshift kitchen is still not ideal, and there’s nothing like looking forward to a delicious meal after work that you can just pop on the stove or in the microwave. It’s like dining out, except cheap, healthy, and guilt-free!
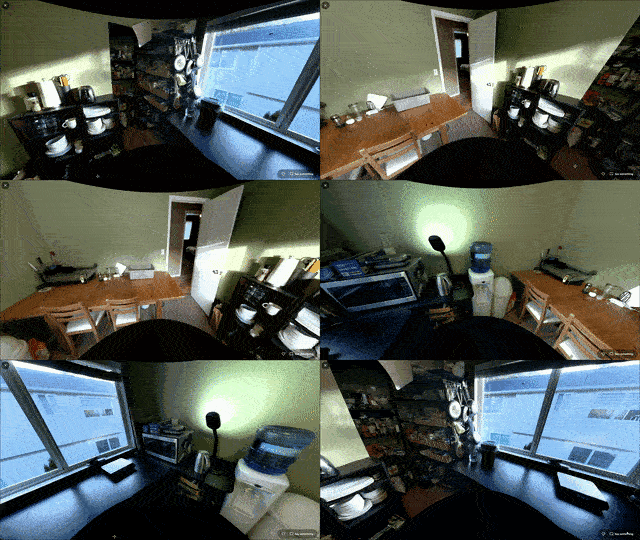
I’m weirdly proud of our setup. Click for 360° view. (Opens in new tab. Once open, click again to activate.)
Cabinetry
Hardware – Hinges, Sliders, etc
Blum hardware is some of the best and will last. Even cheap cabinetmakers will often use German company Blum. There’s a saying in the clothing industry, when discussing why manufacturers will pay more for YKK brand zippers – a zipper won’t make a garment, but it can break it. Hardware is the same.
In addition to longevity and adjustability, silky smoothe glides, and silent soft-close drawers and doors make using your kitchen a joy to use. We can’t wait for this experience upgrade.
Cabinet Makers
For cabinetry, in order of price, we had the choice of:
- Prefabricated Chinese or Ikea kitchen. It’s cheap, but you get what you pay for. It is not very flexible, and doesn’t increase the resale value of your property as much. We inspected our neighbor’s Ikea kitchen, and they showed us the hacks their builder had to come up with to install it.
- Locally custom fabricated cabinetry. This is what we went with. We saved money by going to a company that don’t advertise or even have a showroom.
- Imported custom European cabinetry. E.g. Siematic, who happen to have a showroom in downtown Seattle. Everything they had was European style – designed for small spaces, which I do not have or need. If something is wrong, you’ll have to wait for a factory in Europe to make then ship a new panel. Not ideal. You’re also at the mercy of what some massive company on the other side of the world decides to discontinue.
Materials
I cannot speak to the different materials out there. If you have a resource you recommend, or you would like to contribute to this blog, please let us know in the comments or by contacting me.
Do an Inventory – Plan Your Storage
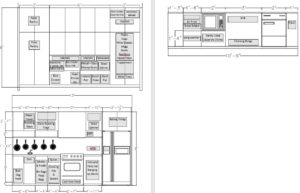
Our designer insisted we create an inventory of all our kitchen items, and map out the new locations. By mapping out on a rough, early cupboard plan, we were able to plan cabinetry with confidence well in advance, have all drawers and pullouts ordered now and installed during construction, and can start using our kitchen with ease right away after completion. Plan to have extra empty storage to expand into as the years go by.
This allows you to also install sliders, drawers and dividers as part of the initial work, as while ShelfGenie are great at retrofitting, they’re far more expensive than doing at all at the same time as your initial renovation.
How to Choose a Range Hood (aka Stove Extractor Fan)
You can spend $200-$5000. So what’s the difference?
Consumer Reports Range Hood Buying Guide is excellent and trustworthy. I would not trust range hood comparison review articles, especially “best of” guides. I don’t believe for a moment they are buying, installing and testing these sometimes very expensive units, and are instead comparing manufacturer-provided specifications and Amazon reviews.
The closest you will find to independent reviews is HVI Certification, which merely confirms manufacturer specifications and noise claims (sones or decibels). Home Depot’s site allows filtering by this, and the HVI database is searchable. I spent hours downloading this database, created my own spreadsheet, and found my ideal hood, only to find out my choices weren’t weren’t compatible with my cabinetry, or had months-long backorders. My advice is to just choose a reputable brand that meet your requirements, and consider getting a package discount with your other appliances.
Here’s my list of variables of the Consumer Reports guide, and various other research I did:
- How much air they move, measured in CFM.
- You need a high CFM (>500 CFM) if you cook foods that produce a lot of steam, smells or smoke (e.g. stir-fry a lot), or you use a gas stove.
- There are a lot of pathetically low CFM (<300 CFM), relatively useless cheap units out there. Avoid.
- We were happy with 500-900.
- Filter type
- steel mesh are cheaper but require more frequent cleaning in the dishwasher and are louder.
- steel baffles are more expensive, but require less cleaning in the dishwasher and are quieter.
- Carbon – only for non-venting, recirculating hoods – need replacement
- Blower location
- interior – in the hood – these are the loudest (double the loudness), cheapest, and most common
- in-line – somewhere in the roof space, between the hood and roof or wall vent
- exterior – on your roof or exterior wall
- Noise
- Measured in Sones, which can be converted to decibels. Sones are linear, unlike decibels, so 2 sones is double the loudness of 1 sone.
- Reduced by steel baffle filters and remote blowers
- Width – a hood wider than your stove will capture more fumes, and allow a slower fan speed and softer fan noise to boot. Strongly consider this. We got a 36″ hood over our 30″ range.
- Interface. Number of fan speeds, types of buttons (capacitive touch, physical buttons), remote, smart features, etc.
- Brand. There are plenty of no-name brands out there, which may check all of the above boxes, at a price that is too good to be true, they’re probably lying about CFM or noise levels (see my HVI certification note above), or the parts are sub-standard and will not last.
Stock levels during COVID are low, with sometimes extremely long backlogs. We are spending a LOT more on a Thermador brand range hood than the other brands I wanted but are out of stock with long backorders during COVID.
Choosing Smart Lights and Light Switches
4″ LED downlights. Nicer than bigger can lights, and nicer than bigger 5″ or 6″ downlights in my opinion.
Yes, you can get dimmable dumb LEDs for $20 ea from a big box hardware store, then wire them all to a smart switch. However, there are very few 3-way smart switches on the market. By going with $35 Phillips Hue ones, we’re also saving money on electrical installation by not needing to wire each switch in. So maybe it works out the same? The Philips Hue dimmable switches are all battery-powered (2 yr battery life, apparently) thin remotes that can be stuck on anywhere (such as the side of a cabinet) and moved around if we need to. Lutron Casaeta remotes are an equal and comparable alternative. These thin switches also allow us to put switches on the sides of our cabinets without cutting into them and installing the wiring and boxes internally.
By not being recessed very far at all, the spread of our 4″ Philips Hue downlights is truly impressive, and we’re really happy with them. We replaced put matching full-color downlights in our living room ($55 ea) and replaced the boob lights in our hallway too, and couldn’t be happier with them.
Electrical Outlets
Fed up with wall plate screws, I went with the clip-on Legrand Radiant collection. Legrand’s USB options are also better (see below).
Should I Buy Tamper-Resistant Outlets?
Buying tamper-resistant outlets now will save you having to buy and use outlet covers when you have babies/toddlers. This investment in safety is also a minor extra selling point when you try to sell your home, and only increases the value of your home.
Having said that, only outlets at heights that may be accessed by small children should be tampter resistant. There is no point in doing other locations.
How do Tamper Resistant Outlets Work?
Tamper-resistant outlets stop small children from being able to jam items in the holes and electrocute themselves. A video of the simple mechanism through which they do this, complete with a disassembly of one of these units is below.
Do I Need To Worry About Amps? 15 Amp Vs 20 Amp Outlets
US power outlets suck. US plugs are not as safe as UK ones (see this excellent video), and unlike Australian angled ones, the prongs are parallel, so the plugs bend. The outlets wear out faster too. And they’re also only 15 Amps! This is a problem in the kitchen, were I might want to use a second appliance at the same time as my 15 Amp portable induction cooktop or 12.5 Amp sandwich press. Therefore I had to find the commercial grade 20 Amp outlets, (with the extra T prong), shown here.
Warning when mixing outlet ranges: I wanted to mix and match different outlets from Legrand, so I could have nicer looking square GFCI plugs. Luckily I emailed them, and confirmed that the plastics are from different vendors, and despite being labelled the same color, won’t exactly match other outlets!
Which USB Outlet Should I Buy?
Another thing I wanted was USB, both USB A and USB C, for better future proofing. This combination is known as “hybrid” USB. I wanted the USB to total 6 Amps. At the time of writing, Legrand did this, Leviton didn’t. Amazon had handy charts to show this.
Should I Buy Commercial Grade Outlets?
In America, outlets that will get frequent use are worth upgrading to commercial grade outlets, as they will not wear out anywhere near as fast. This is because residential outlets rely on a single bent piece of metal to hold plugs in. Commercial grade outlets use a second piece of metal that bends to apply pressure.
A full video breakdown is below, including disassembly of both residential and commercial grade outlets.
Note that in the case of the Legrand brand, Radiant range outlets I bought, I was unable to buy commercial grade directly from Legrand, or even my local big box Home Depot hardware store unless I was a contractor and had an account with them. However, I was able to acquire these no problem from Amazon.
Under-Cabinet and Side-Cabinet LED Lighting
We wanted dimmable smart-lights under the wall cabinets and on the sides of another cabinet. An LED strip is best, but cabinetmakers tend to want to use brands and software that I didn’t trust to have quality software (not buggy, secure, will last 10+ years).
Sadly neither the Philips Hue LED lightstrips (and extension cables from Litcessory) nor the Cync by Savant (C by GE) were good options, because the LEDs were placed far too far apart, and the individual LEDs would be seen.
So I went to a local LED strip manufacturer and supplier Solid Apollo LED here in Seattle and bought an LED strip that has 6 LEDs per inch, for that true neon effect. For 16′ of LED strip lighting, two Zigbee smart adapters, and two power supplies, the total came in at ~$500. There isn’t any other way if your LED channels and diffusers are visible.
Pendant Lights
Firstly, these are surprisingly expensive. You can easily spend $1000+. This was a real struggle for us, involving many hours of work from us and our designer. While we like linear pendant lights (a hanging bar), finding one that is smart-dimmable was an issue. We also spent hours looking for science-y pendant lights we like. Shoshi, bless her, alerted us to designer David Trubridge, and we got the Belle pendant lights, one of the few lights we truly fell in love with, which are reasonably cheap for pendant lights too. We got decent savings on these on Cyber Monday too.
Recommended lighting stores: 2modern, Lightology, Lumens, Rejuvenation
NOT RECOMMENDED lighting stores: We did fall in love with the Asian-influenced designs at ___, but a search for reviews revealed a litany of complaints from customers and a terrible BBB (Better Business Bureau) score. What goes wrong? Delivery never shows up, ridiculously long shipping, damaged items, and just plain low quality items. Do your research.
Countertop
Dekton is a brand name of sintered stone, a type of ultra-dense quartz. No need to worry about stains or heat, like granite, other quartz, or other materials. Get a licensed Dekton installer, or you’ll void your warranty. This is necessary, because it’s so dense, it’s very difficult to cut to size.
Inside one of the cabinets is a “walnut” (TSS Cleaf) countertop, made of the same material as our island cupboard. It looks and feels like real wood, with a wonderful to touch grain. In reality, it’s crepe paper heat-melded with melamine plastic, pressed into a convincing wood texture. It looks and feels great. Great for cabinetry, but will it hold up as a countertop? I hope so.
Floor
Luxury Premium Vinyl (LPV). This is not your parents’ vinyl. Pretty convincing wood look and feel, but water-proof. This is the same stuff they put in supermarkets, which get heavy use. Go to your local flooring specialist and see what you like.
LPV is also much easier to install than other flooring types, with many homeowners installing it themselves!
Microwave
Sharp Drawer Microwave. At $1400USD, these are ridiculously expensive, but they’re a way of not sacrificing countertop to an appliance, and making it a convenient to use under-counter. Sharp make them all, but other brands might put their own interface on the front. The new models have wifi, which is kind of useful for advanced cooking mode.
Another way to not sacrifice countertop space to a microwave is by placing it above a wall-oven, however speaking to fellow homeowners who did this, and an appliance specialist, a common mistake is placing the microwave too high, resulting in them being at an unsafe height for retrieving hot food – think both spills and forearm burns on flip-down doors. This is something some builders and designers are guilty of, in the quest to have cabinets line up, so don’t be lulled by their advice.
Even more expensive than drawer microwaves are speed ovens and steam ovens, at $2000-$4000USD, which use a combination of a magnetron/microwaves, a heating element/infra red radiative heat, and steam to cook food in a fraction of the time.
Sink
In addition to a large size, we wanted to pay extra for:
- Thicker steel for sound absorption (also, sound absorption pads on sides and under sink) and dent resistance. (16-gauge is the thickest on the market, though 18-gauge is not much thinner),
- Better steel alloy that doesn’t tarnish or stain as easily. Type 304 is best. Type 301 or 201 are average. Type 316 is overkill.
- Undermount, so there’s no lip to overcome when wiping into the sink, and no silicone seal to maintain. We love this feature and will never go back.
- Accessory tiers. Cutting board, strainer/collander, drying rack, etc. We use the cutting board a lot, the others never. We paid extra for a sink with two tiers. The second tier doesn’t get used with official accessories, however my Ikea strainer fits perfectly across it and is used very frequently that way.
- Side drain, rather than center, allowing for better use of under-sink space.
- We ended up going with the Ruvati Roma 33“, and 15″ model for the second sink/coffee station.
- Accessories: Our sinks came with accessories, including bottom wire rack colanders, bowls, cutting boards, etc, however only the cutting board gets used. We have enough space to not need the drying rack, found cleaning the included rectangular collander a pain, and have enough counter space to not need to drain items over the sink. Your usage may be very different and you may prefer their accessories.
- The wire rack is great but difficult to clean. The rubber feet and side buffers get filthy and are impossible to clean. But I don’t know of anything better on the market. Cleaning the wire rack is much easier with a large brush. I am very happy with the Winco Cutting Board Brush, which you can buy online or from restaurant supply stores.

A cutting board brush, such as this one from Winco, make cleaning the sink and wire rack much quicker and easier. - The included cutting board is not ideal. African Mahogany is not a good wood to use for a cutting board. Both boards chipped on the edges quickly, knife marks show up very quickly and look ugly, and oiling it is more difficult than my other boards. It looks ugly as all hell. However, it has good weight to it, and fits in the accessory spots perfectly, so we use it very frequently. Once it wears out for whatever reason, I will replace it with a better wood like teak, and cut it to size.
Faucet
This is something where splurging means spending $100-$200 extra, which in a $100,000 remodel, is almost nothing. We’re getting U by Moen faucets, which can be turned on and off by touch, proximity sensor, or voice. Voice control includes temperature and quantity amounts. “Alexa, ask Moen for 1 cup of water.” It also has a color LED that indicates the water temperature. Will we use any of these features? Ask us in a year.
I chose Moen over Delta brand purely because reviewers keep reporting the Delta ones as leaking after a while.
Windows
Ah, windows. They’re so ubiquitous, that if you find yourself in a room without them, someone is either trying to take your money (casino, department store) or organs (operating theater).
If you are getting standard size windows, before you do anything, get quotes from your local big box store (Lowes, Home Depot, etc) to find out what they order by the pallet and generally have in stock. These windows will be half the cost of an item special ordered. And pre-fabbed units will again be a fraction of the cost of custom-made units (e.g. Champion).
The main comparison is the U Value (aka U Factor). If your window gets sun, then you should also consider paying extra for a solar heat blocking film, which will reduce the low SHGC (Solar Heat Gain Coeficient) rating (lower is better).
Range (combined oven and stove)
We got our GE range (combination oven and stove) during a sale in August, months before we started the renovation, because our electric one was frustrating. We figured this was a standalone upgrade could tide us over until the full renovation happens. This is an upgrade I recommend to anyone, whether or not they’re renovating.
Why Choose Induction?
According to WSJ, US induction range shipments grew 30% year-over-year in 2020, versus 3% overall growth overall in the free-standing range category. In Europe the numbers are even better. So why are people making the switch?
Precision and Fast Stovetop Cooking
We need precision control for our cooking. With electric, there is no granular heat control. Say you want 50% power, instead of outputting 50% heat, it will turn on for 30 seconds, then off for 30 seconds, repeat. This makes a difference for some foods cooked in small volumes for which you want to actually control the temperature, not alternate between boiling and sitting there. Also, the moment you turn down the heat, it takes a while for the an electric cooker to stop outputting heat. For gas and induction, it’s instant. It also heats up much faster than electric, and on par with a giant gas flame.
Induction is More Efficient in Many Ways
It’s not just about saving the planet or saving on energy bills. Here are the many ways you benefit from better efficiency cooking.
- Energy efficiency by cooking the base of the pot or pan. No more worrying about having a clean, conductive surface on your cooktop or under your pots and pans
- Flames aren’t coming up the side of your pot or pan, heating up the room instead of your food.
- Reduced need for ventilation. Gas cooktops require higher fan speeds to eliminate fumes and all that inefficient side-heat and spent fuel gas. You can buy a cheaper, lower CFM range hood, and run your ventilation fan at lower speeds, for a quieter kitchen, which I find lowers my stress.
Why Induction is Safer
Unlike electric and gas, induction cooktops cool down within seconds of being turned off. Induction also shuts off automatically within seconds when nothing is on the burner. Models with touch-controls can be locked, which is important if you have small kids who love to press buttons and twist dials.
Induction is Easier to Clean and Looks Amazing
With a glass cleaning agent and scraping blade, there are no stubborn cooked-on foods. The glass surface is not only easy to clean, but it comes back up with a like-new mirror finish which is both impressive to owner and guests.
Range User Interface
For us, a deciding factor was the interface. We wanted something with controls at the front, so we’re not leaning over steaming food. We also want kids, so we still want controls on the top, rather than the front, so small children can’t press buttons or turn dials. It also has a child lock.
We love the touch dials for the stove, but the grid of 12 buttons left of the display is infuriating. There are lots of buttons, and only words, not symbols. GE – take note and please add pictures, and consider NOT grouping all buttons in a grid.
Stove Cooktop Size & Placement
Our main criticism of this unit is that oven ranges are only 30″ wide. We cook big batches, and use multiple large pans at once. Alas, while this otherwise excellent range was ~$2000 on special, separate ovens and wider induction cooktops start at ~$5000.
OCD Bonus: With this wifi-oven, we can remotely check to see if we left the oven on from our phones. Want this feature on your dumb stove? $149 will get you this oven smart switch.
We wanted controls at the front, so you’re not reaching over steaming food to control the unit. But we also wanted vertical controls, rather than the front, so small children can’t touch buttons or dials.
The touch dial interface for the stove is fantastic, but the oven controls to the left of the display have no symbols, requiring you to read text, which is slow and infuriating.
Dishwasher
Our old one was so loud, we couldn’t sleep or watch TV with it on. This was another pre-renovation upgrade, which definitely improved our quality of life.
Now that Meile’s patent expired on a third dishwasher drawer, this awesome feature is more readily available. We ended up going with the quiet, 3 rack Bosch 500 series dishwasher, but I wish I had spent a little extra money on the 800 series, which has better drying technology, and tells you the time to completion.
Smart Smoke Alarm
I admit it. I’m a danger in the kitchen. I leave the oven on sometimes (which is why I like that I can check and control my oven from my phone). Sometimes I leave the room and completely forget that I was cooking something. Or I plain old just burn food.
Smoke detectors are not recommended for kitchens because they will have too many false alarms from steam, and frustrated residents will disconnect their smoke alarm out of frustration. But the Nest Protect has a built-in steam detector too, to negate false alarms from normal cooking! It’ll also give me a little piece of mind knowing I will get smoke alerts on my phone remotely.
Our Amazon Echo devices will also alert us if it hears a smoke detector going off AND we have set the Echo to Away Mode, which we seldom do. We actually got this alert once when an industrious house guest took it upon themselves to test our smoke alarms, after some of the AirBnBs they stayed in had non-functioning ones. Thanks mate, but I run a tight ship.
This unit also has a built-in nightlight which can either stay on when the lights are off, or turn on if motion is detected – very useful when getting a glass of water or going to the bathroom.
Garbage Disposals – Why So Many Choices?
Consumer Reports free guide on garbage disposals is your go-to ultimate guide. Read this!
Consider a paid Consumer Reports membership to access their ratings chart, and support independent reviews.
We do not use our garbage disposals to get rid of large amounts of waste, instead seeing them as a stress free way to not worry about bits of food going down the drain. Yet we still spent ~$230ea for a mid-range 3/4hp model rather than a 1/2hp low-end model. We’re willing to pay for a quieter unit, that grinds food smaller for fewer pipe blockages, and has a stainless steel, rather than plastic grind chamber for a longer life.
We were also able to get a model exclusively available wholesale to contractors for the same price as the similar retail unit, the differences being an extra year warranty, an auto-reverse function, and a stainless steel, rather than plastic grind chamber. disposalxt.com’s comparison page was the best I could find, though bestgarbagedisposals.com data was also good.
If you’re comparing Insinkerator models, don’t use the comparison chart on Amazon. Use the chart on their website, which is far more up to date.
Shades
In the US, there are a handful of brands that dominate the market. We went with Levolor, which is made by the more expensive Hunter Douglas, at a fraction of the price, and we did our other rooms while we were at it.
Levolor/Hunter Douglas is NOT the leader in motorized smart shades. According to Wirecutter, Lutron are. However, we only need 2 hard to reach windows to have smart shades, and Lutron ONLY do motorized shades. Hence the decision to choose Levolor.
Though Levolor have an app and an API, at present there are no integrations with SmartThings, Alexa, or other smart home controllers, so I will be buying the Wevolor as an after-market upgrade to connect those things.
We went through big box store Lowes, rather than buying online or direct, due to better warranty support by having a local store. Sales are frequent and range from 20%-35% off, so if you can plan ahead, so do.
Expense Sheet
Prices are in USD, and include Seattle’s 10% sales tax.
| Item | Brand | Model | +Tax |
| Designer | Varies | ||
| Designer Commission | Varies | ||
| General Contractor | $60,000 | ||
| Cabinetry (incl. $7000 special cabinet) | $30,000 | ||
| Floors, Stairs (material, not labor) | $13,000 | ||
| Countertops | Dekton | $10,000 | |
| Range | GE | PHS930BLTS | $2,600 |
| Dishwasher | Bosch | 500 Series | $900 |
| Fridge | LG | LRMVS3006S | $3,600 |
| Microwave Drawer | Sharp | SMD2489ES | $1,400 |
| Range hood | Thermador | VCIN36GWS | $2,800 |
| Sink – Island | Ruvati | RVH8222 | $700 |
| Sink – Wall | Ruvati | RVH8304 | $300 |
| Faucets (x2) | Moen | 7864EVSRS, 169031 | $1,200 |
| Pendant Lights | David Trubridge | Belle medium & large | $1,300 |
| Electrical outlets | Legrand | USB or GFCI, 20A commercial grade |
$400 |
| Gardbage Disposal x2 | Insinkerator Emerson | Pro 750 | $702 |
| Windows (x2) | $300 | ||
| Paint | Sherwin Williams | $492 | |
| Materials (building, plumbing, wiring) | $4000 | ||
| Lights, Switches, Sensors, Smart Smoke Alarm | Phillips Hue, Nest | $1,400 | |
| Portable Induction Cooktop | Duxton | 9610LS BT-200DZ | $120 |
| Blinds | $4,000 | ||
| Other | $200 | ||
| TOTAL | $139,414 |

